2E.max porcelain veneers are renowned for their durability, aesthetics, and natural-looking results. Whether for a crown or veneers, careful prep is necessary for a seamless fit and long-lasting results.
Why focus on Veneer Prepping?
Veneer preparation lays the foundation for how a patient's teeth look aesthetically and function. No matter if the porcelain veneers are for discoloration, minor misalignment, or structural imperfections, veneers prep should be tailored to each patient, focusing on:
- Their needs
- Existing conditions
- Desired results
- Durability
- Longevity
Advancements in digital technology have revolutionized veneer preparation. Digital scanners accurately record teeth prepared for veneers, capturing smooth preparations with increased precision. This accuracy leads to a more precise and comfortable fit for the final restorations.
Veneer Prep Guidelines
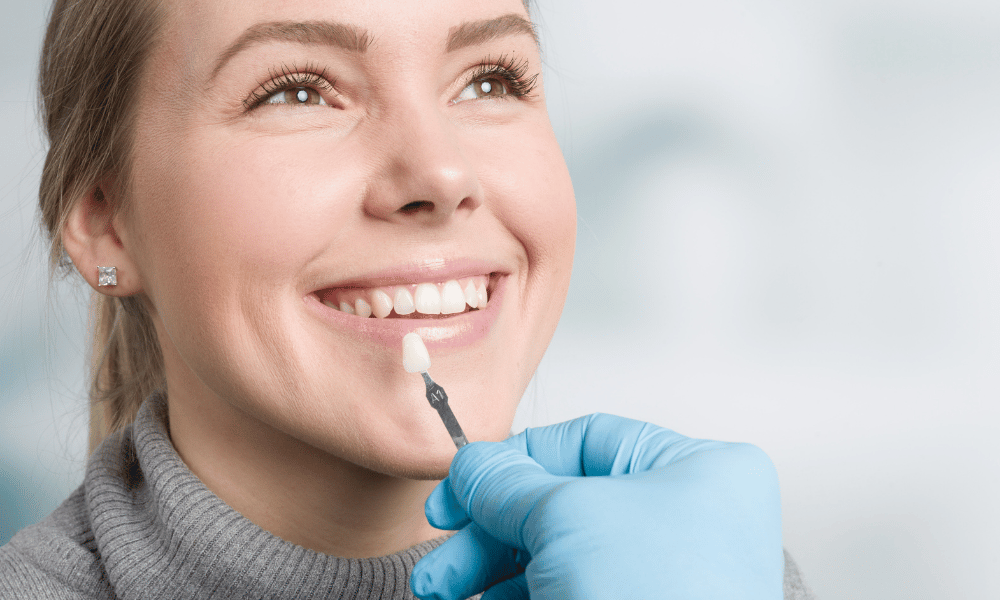
Selecting the Right Shade
Choosing the perfect shade for a porcelain veneer is critical in achieving a natural-looking smile. There are several factors to consider, such as:
- The patient's preferences
- Facial features
- Natural teeth shade
- Skin tone
If your patient isn't getting a complete set of veneers, match the shade to the natural teeth. Aim for no more than two shades lighter for patients who plan on whitening their teeth.
Veneer shade cards are valuable tools for categorizing shades based on natural tooth undertones. These cards have options ranging from reddish brown to bleach shades.
Veneer Prep Dimensions
After choosing the right tooth shade for your patients, it’s time to prepare the veneers. One critical aspect of veneer preparation is tooth reduction. Tooth reduction ensures the veneers blend with adjacent teeth, and insufficient reduction can result in bulky restorations that lack harmony with the surrounding teeth.
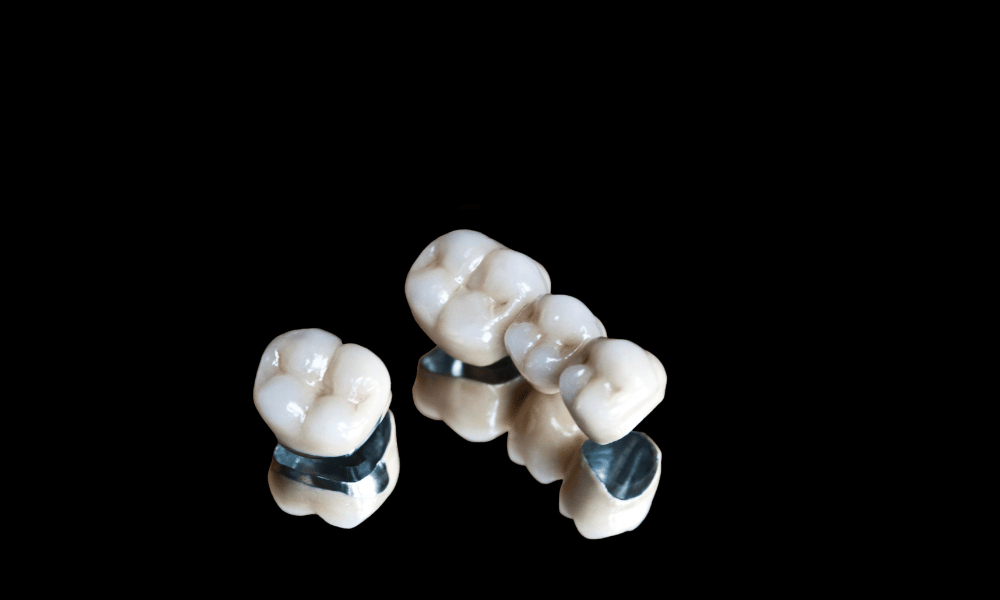
Each type of veneer material requires a specific prep design and minimum thickness to guarantee strength and durability. E-max veneers are lighter and apply more easily compared to other veneers, so only minimal tooth reduction is required.
The natural tooth underneath might be visible, as the veneer shell is thin. If your patient's teeth are heavily stained, lighten them before applying the veneer.
Planning Veneer Preparation
When planning veneer preparation, keep in mind:
- Worn or aged teeth often require less preparation than younger teeth
- Misaligned teeth need adjustments based on anticipated tooth form and position.
- Variations in the widths and heights of existing teeth also affect veneer preparation.
Preparation parameters for minimal, moderate, and aggressive veneer preparation differ based on the extent of correction required. Minimal veneer prep typically involves a facial tooth preparation ranging from 0.5 mm to 0.7 mm, whereas moderate veneer prep ranges from 0.8 mm to 1.00 mm. More aggressive veneer preparation may require facial preparation ranging from 1 mm to 1.5 mm to address pronounced aesthetic and functional issues.
Three Types of Veneer Prepping
Based on the veneer prep dimensions you figured out when selecting the color shade and deciding the amount of tooth reduction necessary, there are three types of veneer prep. The material for your patient's veneers will vary depending on the kind of prep needed.
1. Minimal Veneer Preparation
Minimal veneer preparation is a conservative approach for veneers prep. It is particularly suited for addressing:
- Mild discoloration
- Worn, chipped, or broken teeth
- Enamel defects.
This technique is for minimal shade or shape alteration, ensuring a natural-looking result.
Minimal prep is best for properly aligned teeth with minor color discrepancies and no significant gaps between them. The recommended materials for minimal-prep veneers include pressed monolithic ceramics like e.max or feldspathic layered veneers.
Typically, patients undergoing minimal-prep veneer procedures require two visits to the dental practice. In the first visit, a small amount of enamel is removed, and impressions are taken to fabricate custom veneer restorations. Temporary restorations are placed to maintain functionality and aesthetics, while the final veneers are crafted in a dental laboratory.
2. Classic Veneer Preparation
Classic veneer preparation balances significant cosmetic improvements with preserving tooth structure. This veneers prep style commonly addresses moderate shade and shape changes.
Pressed layered ceramics like e.max or feldspathic layered veneers are recommended since they are durable and versatile.
3. More Aggressive Veneer Preparation
More aggressive veneer preparation is for cases requiring significant shade changes or addressing structural deficits resulting from trauma or malocclusion. It involves removing a more substantial amount of tooth structure, up to 1.5 mm, possibly extending beyond the enamel and into the dentin. As a result, appropriate adhesive techniques are a must for the long-term success of the veneer placement.
This veneer prep style is best suited for cases requiring severe alignment corrections, such as:
- Diastema corrections exceeding 1 mm
- When multiple diastemas are present
- Addressing shade changes of up to 3 steps in chroma or value
Pressed layered ceramics like e.max or feldspathic veneers are recommended for more aggressive veneer preparation due to the material's durability and versatility.
Tips for the Best E.max Porcelain Veneer for Your Patients
Attention to detail is crucial for veneer prep so that the patient's restorations fit, are durable, and look natural. Here are a few tips for getting teeth prepped for veneers.
Wrapping Porcelain Veneers
During veneer fitting, you should determine the occlusal contact points. If the lower opposing tooth makes contact with the veneer, drop the veneer marginal interface by 1–2 mm while checking that it's clear of occlusion. Rounding the edges is essential for both functionality and aesthetics. Sanding discs or rubber points are preferred over high-speed burs to avoid creating harsh edges.
Avoid 'V' Shapes
Maintaining rounded interproximals and transition lines simplifies the milling process for restorations. Sharp edges and 'V' shapes can complicate fabrication, leading to poorly fitting veneers. PRO-Craft can more effectively produce tight-fitting veneers by keeping edges rounded, ensuring a seamless final result.
Follow Facial Reduction Planes
Visualizing the final incisal edge and utilizing depth-cutting burs along different planes of the tooth provides the technician with plenty of space to work. Following the facial reduction planes ensures consistency and precision in preparation.
Choose the Right Cement
Cementation is vital in the longevity of porcelain veneer restorations. Combining light-cured/self-cured glass ionomer resin cement provides maximum bond strength and durability. Cement choice can also affect the final appearance of translucent restorations. Many veneer bonding systems provide tinted or color-corrected cement to mask minor underlying discoloration and achieve the ideal color match.
Work with a Dental Lab You Can Trust
One of the most important things for ensuring your patient's veneer prep goes smoothly is to work with an experienced dental lab.
With over 40 years of experience, the PRO-Craft Dental team knows how to create beautiful restorations and provide high-quality customer care. When working with us, you have direct access to our master technicians, who will assist you during every case.
Give your patients the restorations they deserve by working with PRO-Craft Dental. Contact us today to get started, or request a free starter kit.

.png)
.png)